Monday, March 25, 2013

Mexican Chocolate Waffles & Mexican Chocolate Bacon

The definition of  in·ter·na·tion·al- involving several countries: involving two or more countries or their citizens.


The definition of waf·fle is-thick light crisp pancake: a thick light pancake, crisp on the outside, that is baked in a waff,   ........

umm let's forget about the formalities, the definition of a waffle is a buttery, sweet, pure bocadito ( mouthful) of heaven mixed with a forkful of deliciousness!

Anyway, for those of you who might not know March 25 is International Waffle Day!  And since I am in love with waffles and I adore International, ok well you can't actually adore "International" I know that.

However I do have a fascination with other countries and it's cultures, especially those countries in Latin America ( especially, Mexico).

So in honor of two my favorite things, coming together on one day I made you waffles to celebrate. 

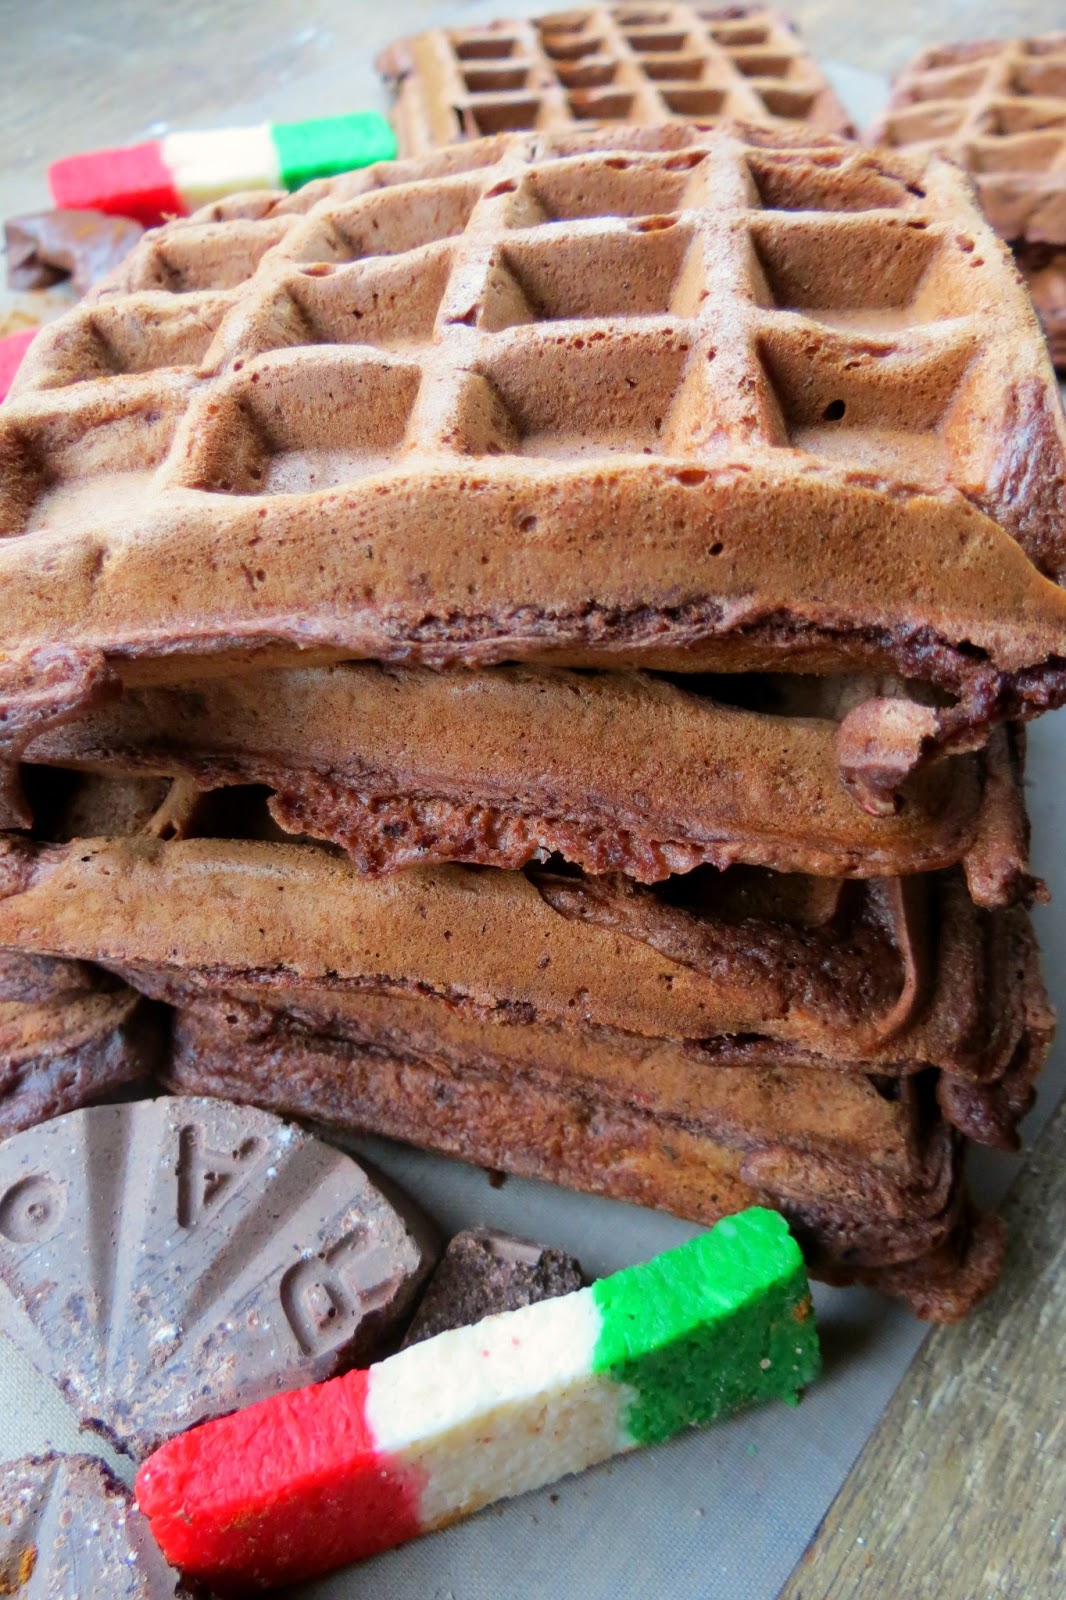
Not just any plain old  waffles however, nope that's just not what I do.....


 I made you Mexican Chocolate waffles infused with rich cocoa and spicy cinnamon, and what would any extraordinary breakfast be without it's savory & rich meaty sidekick?!

So to feed the carnivorous, chocolate addict in you ( if there is such a thing)


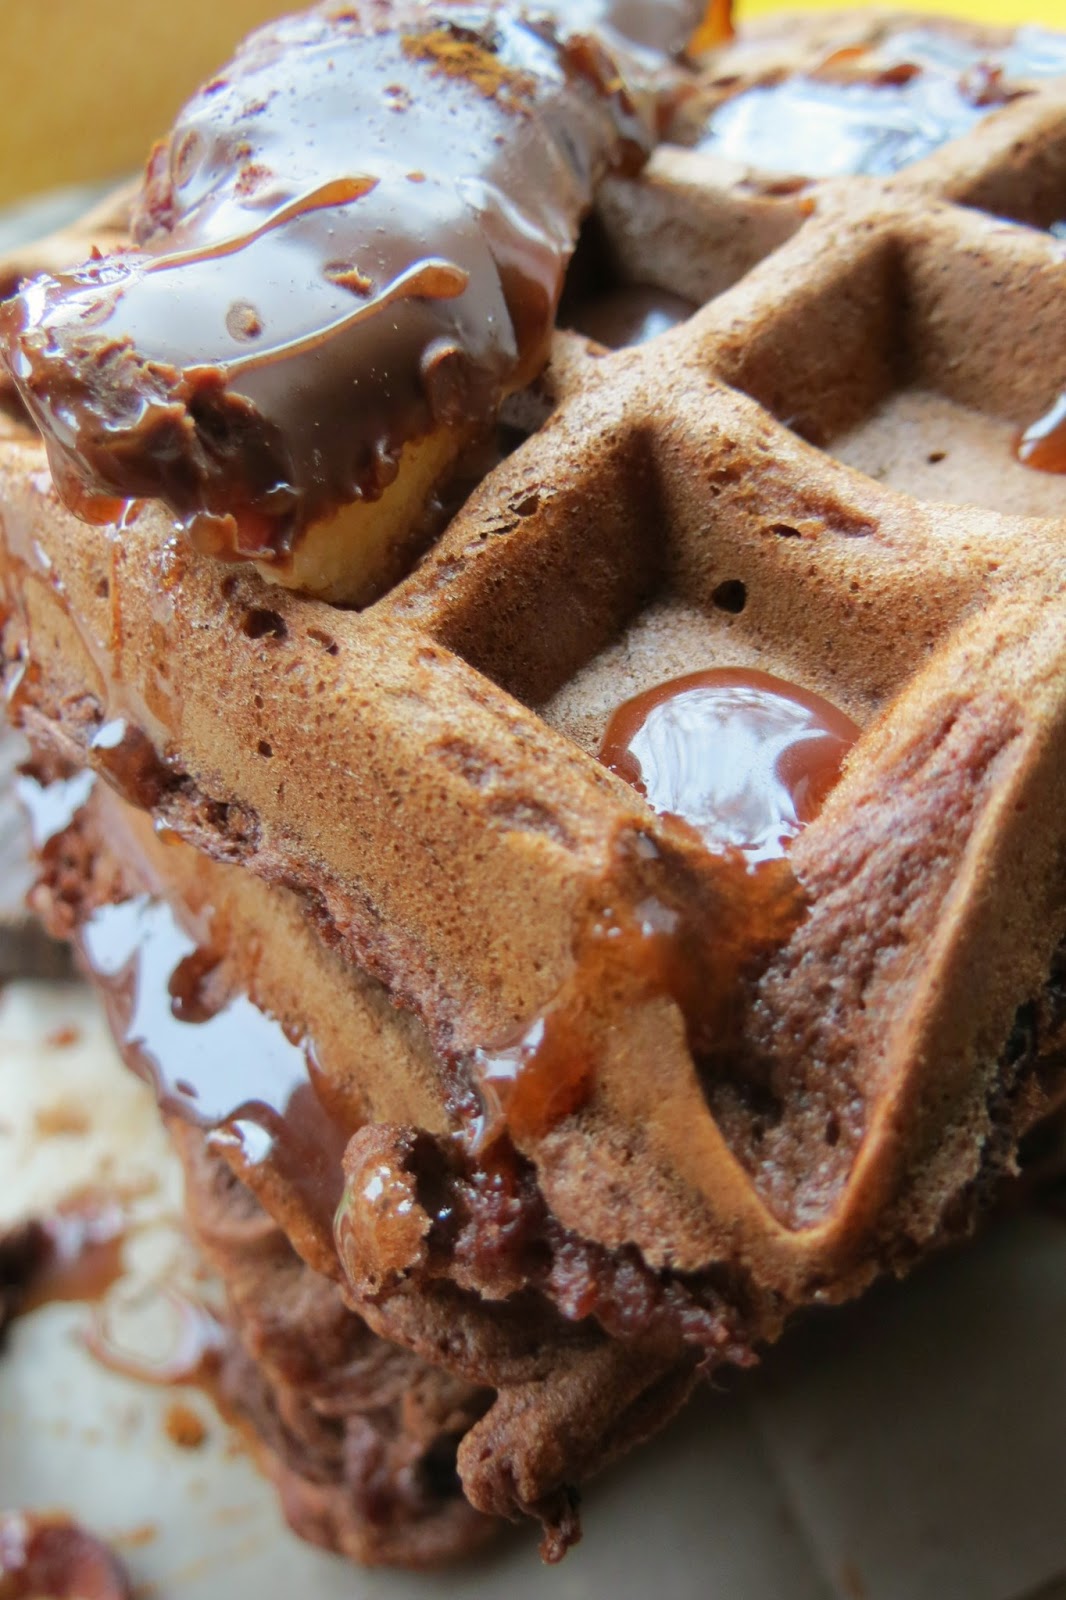
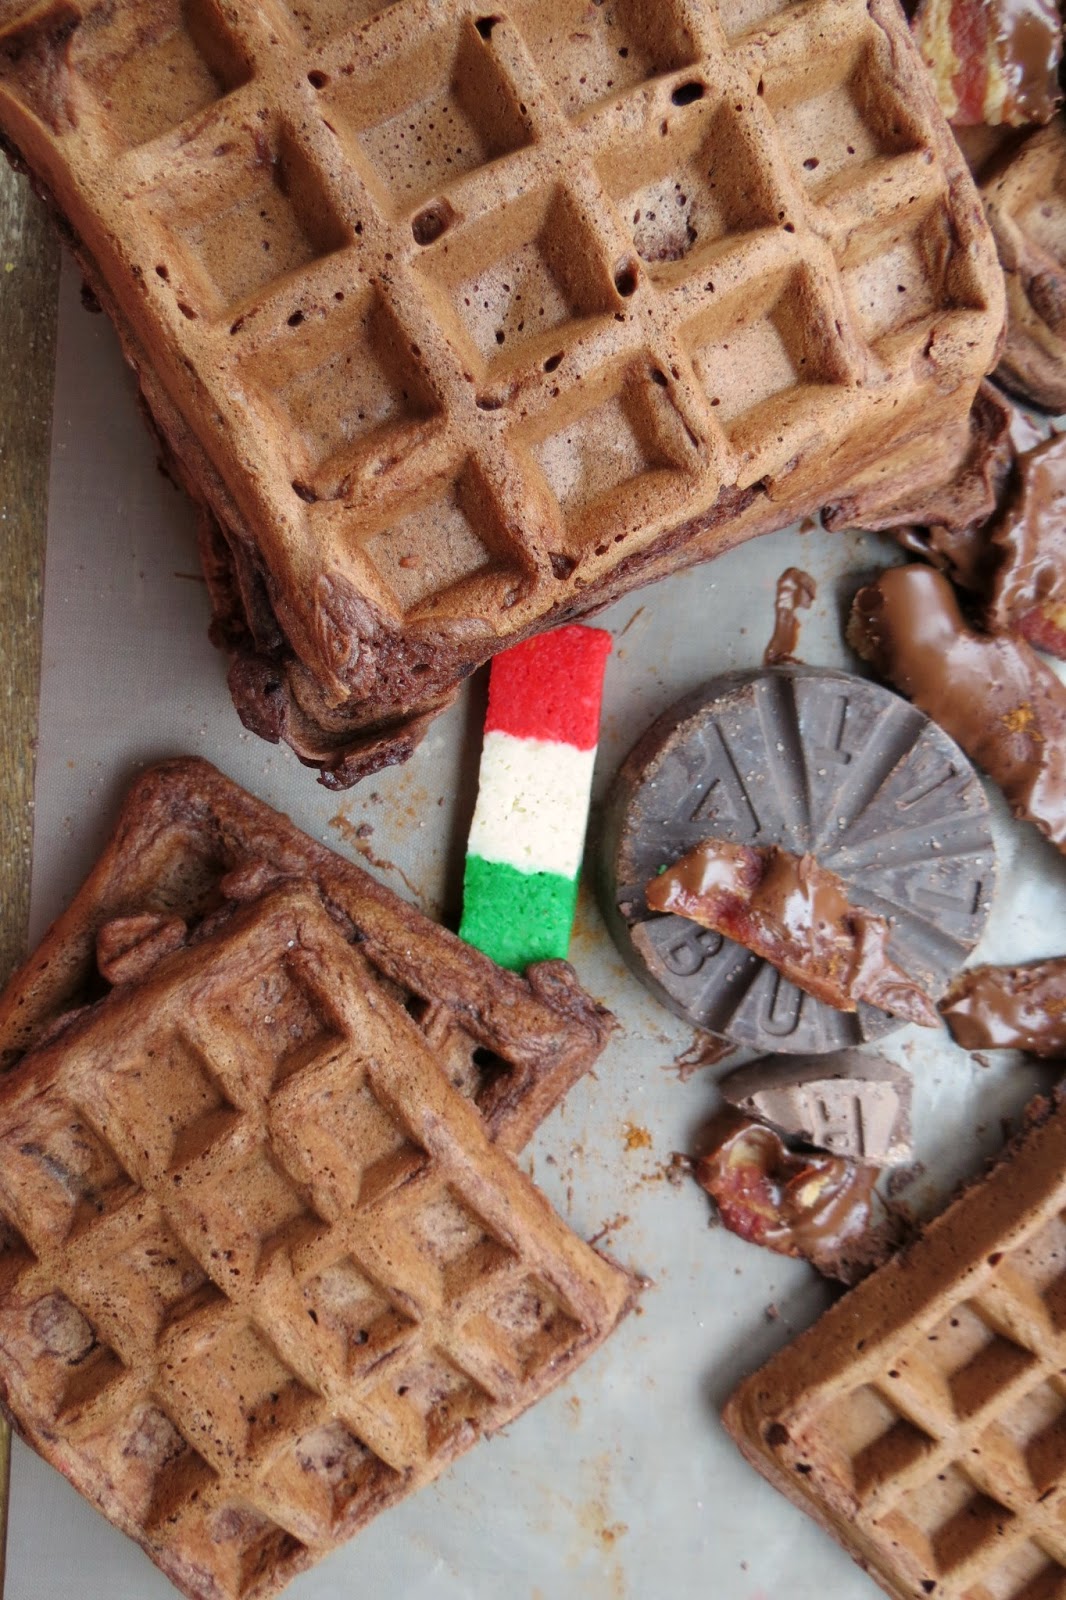
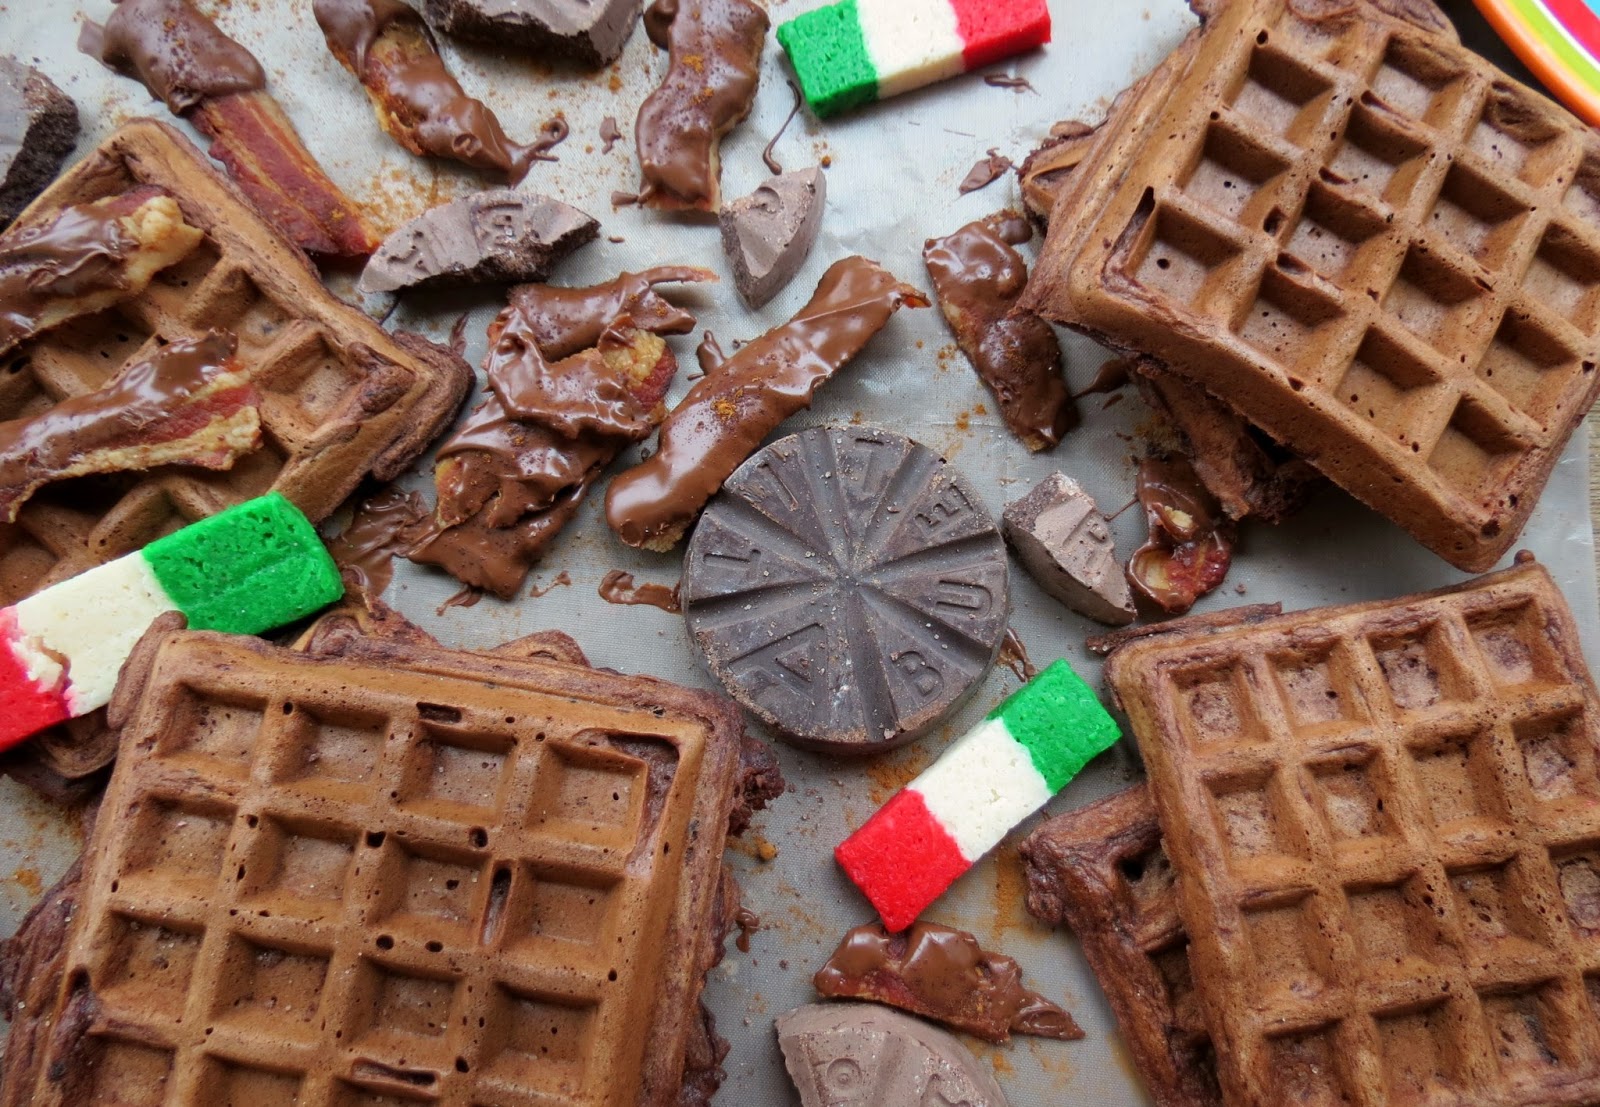
I dipped crispy strips of hickory smoked bacon into chocolate that has been involved in a super secret cinnamon romance.

Better known as " Mexican Chocolate Bacon"

ohhh! yes I did!  Is your mouth watering yet?  I hope it's ready for some chocolate lovin! Because this is the true definition of

" International Breakfast Love"!


                                                          Mexican Chocolate Bacon

- 6 strips of hickory maple bacon ( or whichever you prefer)
-1/2 cup of chocolate chips
-1/2 tsp of cinnamon
 
1. In a skillet or on a microwave safe plate, cook your bacon until crispy and set aside;
 
2 .Melt your chocolate chips in a microwave safe bowl on 70% power, stirring every 30 seconds until chocolate is completely melted.
 
3. Once chocolate is ready, take each of your crispy strips of bacon and dip them into your melted chocolate. Place them onto a piece of wax or parchment paper to allow the chocolate to harden. Get started on your waffles.


                                                                   Ingredients       
  •  1 1/2 cups of flour
  •  3 tablespoons of sugar
  • 1/2 cup cocoa powder
  • 1/4 cup of cinnamon
  • 1 teaspoon baking powder
  • 1 teaspoon salt
  • 1/2 teaspoon baking soda
  • 3 eggs, beaten
  • 1/2 stick unsalted butter, melted and slightly cooled
  • 1 teaspoon pure vanilla extract
  • 2 cups of buttermilk, room temperature
  • 3/4 cup of chocolate chips (optional)
  •  non-stick spray for your waffle iron

  •  


                                                                           Directions                                
     
     
    yield-6-8 waffles, depending on waffle iron
     
    1.Preheat waffle iron.
     
    2.In a medium bowl whisk together the flour, sugar, cocoa powder, cinnamon, baking powder, salt, and baking soda.
     
    3.In another bowl beat together the eggs and melted butter and vanilla, and then add the buttermilk.
     
    4.Add the wet ingredients to the dry and stir in the chocolate chips just until combined. Let waffle mix sit for 5 minutes.
     
    5.Ladle waffle batter onto the center of the iron. Being very careful not to overfill the waffle well. Close the iron top and cook until the waffle is crispy on both sides and is easily removed from iron.
     
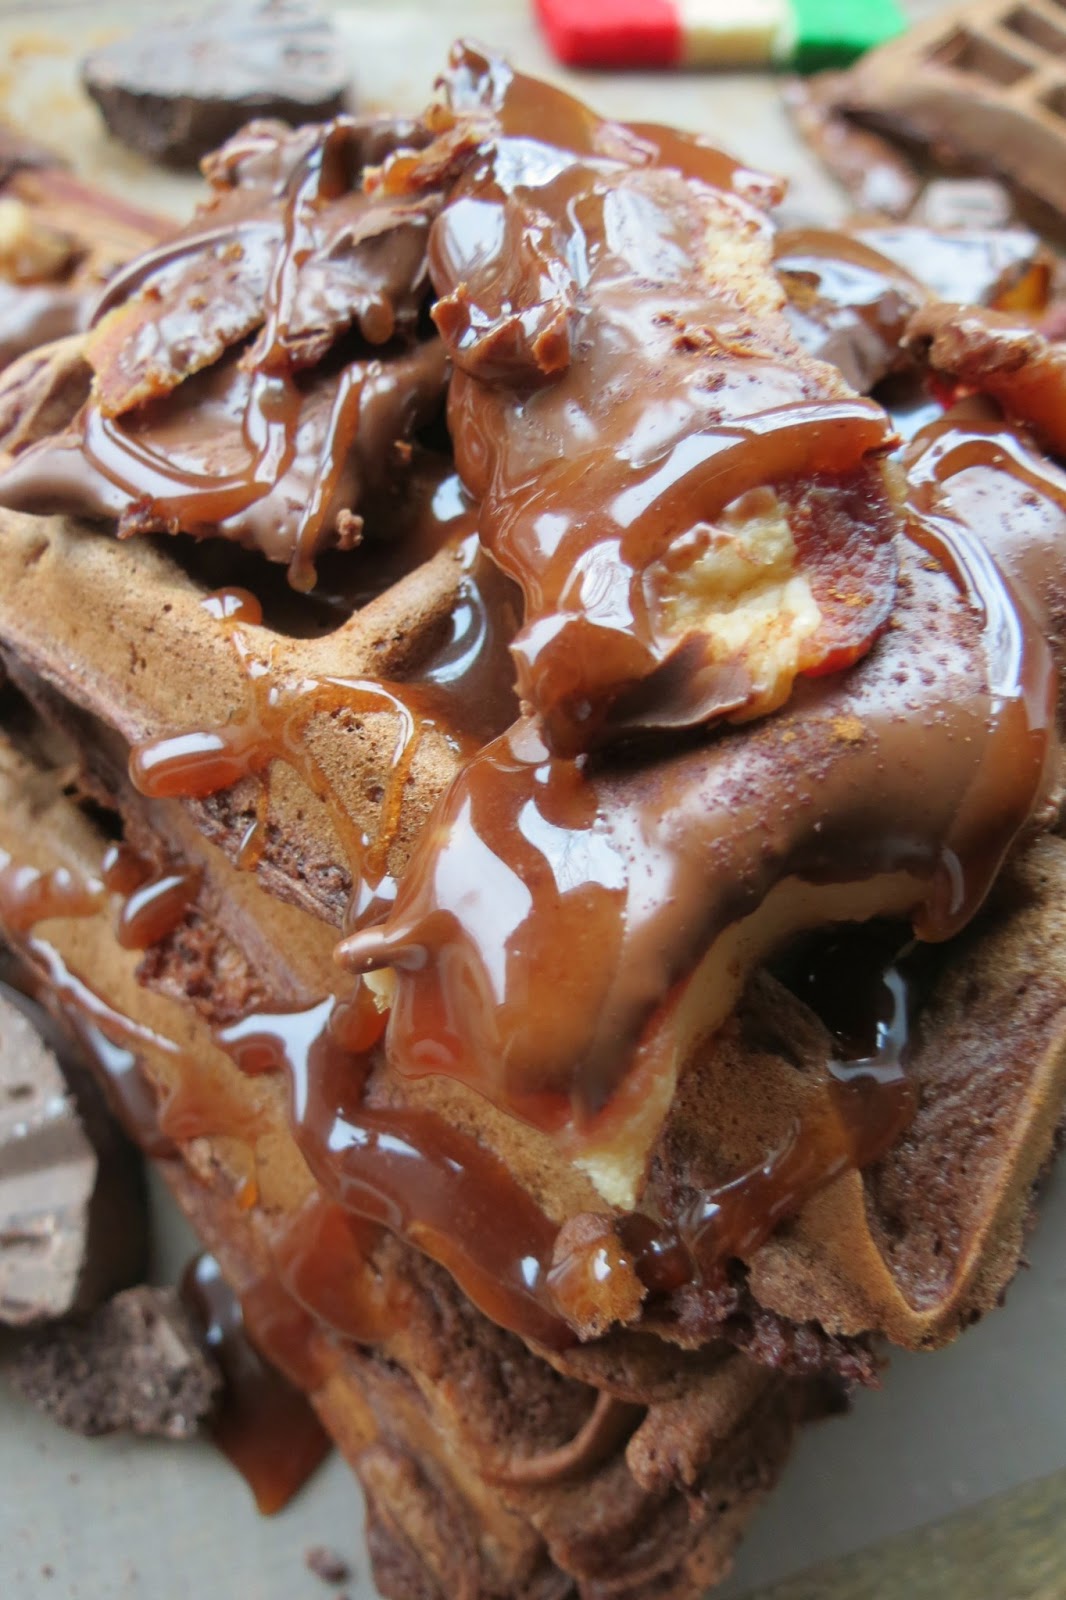
    Once your waffles are ready, you can butter them up and pour on your syrup and get ready for a real chocolate fix.  I actually had some leftover chocolate and I mixed that with a 1/2 cup of maple syrup and a sprinkle of cinnamon to take this whole Mexican chocolate waffle thing to an insane level.
     
    Now it's time to grab your Mexican Chocolate Bacon, a great big glass of agua or orange juice. And let the chocolate fiesta begin!
     
    Serve immediately or keep warm in a oven until ready to serve.


    Monday, March 18, 2013

    Cherry Mexican Raspado

    What happens on a Saturday morning, when you wake up to rain, then hours later that rain turns to drizzle, that drizzle turns into huge beautiful quarter sized snowflakes.

    Then within an instant the heavens open up and the whirlwind of weather turns the romantic snow scene into a snow/rain/ice fusion also known as hail.

    So what do you do when God decides to give you all you can eat perfectly sized frozen chunks of ice?  Well, you grab some plastic cups fill them to the brim with frozen sky pour in some cherry juice infused with grenadine, toss on a couple of plump cherries and make yourself a " luscious"
    Cherry Mexican Raspado. 


    Yours may not come with the heavens stamp of approval like mine, but it will taste heavenly and that's almost just as good!


    The word raspado derives from the Spanish word raspar- which means to scrape.

    If you've never heard of a Mexican Raspado, it's kind of like an Italian ice, but the ice is much more coarse and they can be made into so many yummy flavors.....which include cupcake! 


    Well not exactly cupcakes, but I loved these icy treats so much I did make them into cupcakes.

    You can see them here and find out a little more about " El Senor Raspado" and his delicious raspado flavors!

    So you have to entender ( understand) that my shaved ice was truly a pure gift from El Cielo, so I used quick ingredients from my kitchen.  I will give you my super simple recipe

                                                             Ingredients
    shaved ice
    grenadine syrup
    cherry juice
    maraschino cherries

                                                            Directions
    1. Quickly run out your back door and find the cleanest, freshest batch of ice you can find. If you weren't lucky enough to have the heavens provide the ice, then you can put some crushed ice into a blender.

    2.Start with about 1 to 2 cups of crushed ice. Once you have the ice in the blender, you should also add 1 1/2 cups of water into the blender.

    3.Next, you need to turn on the blender and blend the ice and water together. Make sure not to keep blending until the mixture is liquid. Check the consistency of the mixture and you can add ice as needed. You want the mixture to have the consistency of shaved ice.

    4. Once your ice is ready, scoop it into cups and pour your grenadine in and next your cherry juice sprinkle on a few cherries and VOILA! Your very own nature made raspadito!

    Okay and now here's one that takes a little bit longer but sounds super delicious!  

    Cherry Lime Raspado


    Thursday, March 14, 2013

    Rainbow Gold Cupcakes

    Every year it feels like the holidays are arriving faster than ever. 


    As a little chica I would wait and wait for Christmas to come, my Christmas list ready since mid-summer for the happy handoff on Santa's lap. 


    I would count down the days one by one and from November to December and it seemed like it was like 465 days until Christmas, instead of 30. 


    But now that I'm older I can't seem to slow down time fast enough, in one moment I'm making milk chocolate hearts for Valentine's Day, than I'm hiding Easter eggs,


    before I can even stop to think I'm picking out Halloween costumes


    and then before I can even blink I'm flinging up my Christmas tree just to begin gently wrapping everyone of  my 1,500 breakable ornaments ten minutes later.


    So it's no surprise to me that this year St. Patrick's Day and Easter are all crammed together in the same month.


     In honor of this year's holiday mash up I decided to make cupcakes that celebrate los dos ( both of them).


    They are sweet little rainbow striped cupcakes with a great big golden chocolate filled egg. They are colorful enough to please a Leprechaun and have just enough chocolate for Easter bunny approval!


    I thought it would be perfect to make these cupcakes in a flavor that would highlight their sunny appeal, so I replaced the vanilla extract in my buttercream with orange extract.


    I even spiked my cake batter with un poquito ( a little bit) too!


    The result was a colorful and feliz (happy) cupcake on the outside, with a vibrant orange inside that was like biting into a little piece of Sunshine!

                                                               INGREDIENTS

    For Orange Buttercream Frosting-adapted from Gale Gand Recipe
  • 3 cups confectioners' sugar
  • 1 cup butter
  • 1 teaspoon vanilla extract
  • 1 to 2 tablespoons whipping cream

  •  
     
     
                                                         DIRECTIONS
     
    In a standing mixer fitted with a whisk, mix together sugar and butter. Mix on low speed until well blended and then increase speed to medium and beat for another 3 minutes.

    Add orange extract and cream and continue to beat on medium speed for 1 minute more, adding more cream if needed for spreading consistency.
     
     
    For the Orange Cupcakes-
     
    1 box of yellow or white cake mix
     
    1 tsp orange extract
     
    Follow the instructions on the cake mix box and simply add in a tsp of orange extract.
     
    Rainbow Stripes
    1 can of vanilla frosting ( Pillsbury)
    colorful dye ( enough colors for a rainbow)
     
    1.In order to make the rainbow stripes that run along the cupcakes, you need to take a can of classic vanilla frosting.
     
    2. Divide about  1/4 cup of frosting into 6 different cups ( or less if you choose) for each color of your rainbow.
     
    3. Microwave each cup for about 15 secs until it's a pourable consistency, than add your colors to each cup and mix.
     
    4. One color at a time using a spoon, drizzle color along each cupcake until you have a complete rainbow of colors.
     
    For the Golden Eggs
    Cadbury Eggs
    luster dust
    vodka
    paint brush
     
    1. You need to take your Cadbury Eggs and use a edible paint called luster dust, which you can purchase at your local cake supply store or online here.
     
    2. I usually just use the top from the luster dust and pour a sprinkling of it directly into the cap.  Then you will need just a little pour of Vodka, enough to wet the paint but not overflow into the cap with the luster dust.
     
    3. Next, dip your paint brush into the luster dust/vodka mix and paint directly onto your Cadbury Egg, leave them to dry on a piece of wax paper or baking sheet.
     
    4. Once your eggs are dry, gently place them on top of each cupcake, than get ready for all the oohhs and ahhhs you will get from these pretty little treats!


    Monday, March 11, 2013

    Apple Pie Guy- Mini Apple Pies

    Apple Pie......here in America it's famous for being a wholesome, all around delicious everybody's gotta love it kind of treat. 


    I myself adore apples in almost everything.......  I eat them in my pies, in my morning oatmeal, I eat them in my Newtons! 


    Well, actually I used to eat them in my Newtons until they were tragically discontinued but Raspberry & Strawberry Newtons remained happily on the shelves!  Ummm! Has the Nabisco company ever heard of " American as Apple Pie", not Raspberry, or Strawberry! A-P-P-L-E.......Apple!

    Uhhhh, despite my many calls to them demanding an explanation and a timely return of the Apple Newton, I am sadly still waiting for them to come to their senses.  Anyway, I'm sure my love for apples is one of the reasons I had a desire to make these cute little pies,


    their shape and flaky crust remind me of the way McDonald's apple pies used to be. Oh how I loved them so ( and btw, if your lucky enough to live I Tampa, FL, after 20 years these pies are back!) 


    The name for these adorable pies, is actually a little joke that a good friend of mine and I have together.  I say he is a " Don Juan" type of guy, and he always laughs at me and says


    " No Way!, I'm a real " Apple Pie Guy!"  Which means that he is no way the smooth talking, Latin lover type I like to call him.  Rather an all around caring type of guy, that is as genuine, honest, innocent and as sweet as " Apple Pie".


    When given the choice between the two of them.......I'd pick the pie!


    Because I was in a super hurry to feed my apple addiction I use premade Goya Empanada Discs and stuffed them with already canned apples.  I found a recipe here that looks pretty delicoso that is more of scratch recipe.

                                                                                    Ingredients

    Goya premade empanada discs

    1 can of  Comstock canned apple filling

    1/4 tsp cinnamon


                                                                                Recipe

    1. Be sure to thaw you frozen Goya empanada discs before you begin,  once thawed using a 4 inch rectangle cookie cutter ( you can really use any cutter you want, you have options) cut out 20 rectangles. 

    2. Open your can of apple filling, scoop out a cup and mix in your 1/4 tsp of cinnamon, at this point you can either chop by hand or blend apple filling in a food processor for about 20 seconds. This will allow the apples to be small enough to fit into the mini empanada pie crusts.

    3. Once the apples are chopped, scoop about a 1/2 tsp onto each empanada rectangle ( remember to only use half of the rectangles. Leaving the other half as the top of the pies.

    4. Get a little cup of water and a small paint brush, or you can just dab your finger in a little water and run it along the edges of the apple filled empanada dough. 

    5.  Take the other half of your empanada dough and place them on top of the one's filled with apple, press the two rectangles gently together being careful not to allow the apples to seap out the sides. Press a fork around the edges to ensure a proper seal.

    6. Once all the pies are ready, gently place them into grease, be very mindful because they will golden very quickly.  It will take about 1 minute for them to brown up on each side.

    7.  Once golden brown, remove them from the oil and place them on a paper towel lined plate.  Although you will want to instantly sink your teeth into the golden flaky crust and reach the appley goodness..... you can't the hot filling will scorch your tongue.  Once the minutes have slowly ticked by and the pies are cool enough to eat, take a bite and welcome yourself to my Apple Heaven!

    Friday, March 1, 2013

    Justin Bieber Birthday Cupcakes

    You may not be aware of it or not, but today is a pretty big deal!  Some even think it should be a National Holiday!..... Who you may be asking?


    Who are these people aware of a day so monumental, so huge, so grandioso?  Why are they so special that they get to partake and enjoy in a fiesta that you may not even be privileged enough to already know about? 


    Well they are called " Beliebers" and they are an elite group of girls and even boys who are fanatical devotees to everything and anything that surrounds, talks about or even looks like Justin Bieber. 

    They will tweet him 3,500 times a day, buy all his records, wear his clothes. They will watch every show he has ever been on, whether is on television or on youtube. 


    They will sleep out on the streets of New York City for days just to hear him sing.  These same " Beliebers" beg and plead  for their parents to buy them $300 tickets to one of his sold out concerts, from a slimey ticket dealer that buys them low and sells them high. 


    So with fans so dedicated to everything Justin Bieber, one would expect for them to be on nothing less than full on party mode March 1st. Why? Because it's Justin Bieber's birthday of course!


    One school in my district is so loyal to their students and all that they love, that they decided to hold an in school party to celebrate " the biebs'" big day.


    They approached me about making cupcakes for this sacred event, and ummm I was more than happy to oblige.


    Since I am the proud owner of 3 of the millions of girls who have Bieber Fever and truly believe today should be a national holiday. 


    And as a loca mom who actually did sleep on the streets of NYC just to allow my girls to get a glimpse of Bieber.


    And as the kind of Mom one who isn't afraid to say that she absolutely LOVES his new album Believe. 


    I have to admit I wouldn't mind actually having another holiday added to the calendar!


                                                        Recipe

    There really is no need to attach a recipe for these cupcakes, you can use any cupcake and frosting recipe you wish. 

    Obviously you don't have to do Justin Bieber, you can use this idea for any singer, actor or character you prefer.

    The hardest part is collecting various images of your favorite singer or character laminating them and cutting them out.


    For the white chocolate hearts and the J & B initials,  I melted white chocolate wafers in the microwave, heating them on 70% power stiring them every 30 secs until fully melted. 

    Then  just used a standard piping bag ( or even a Ziploc with a small snip on one corner) and piped the intials and the hearts onto a piece of wax paper. I waited for them to fully dry than and gently placed them onto the cupcakes.
    01 09 10